Digimon Arena
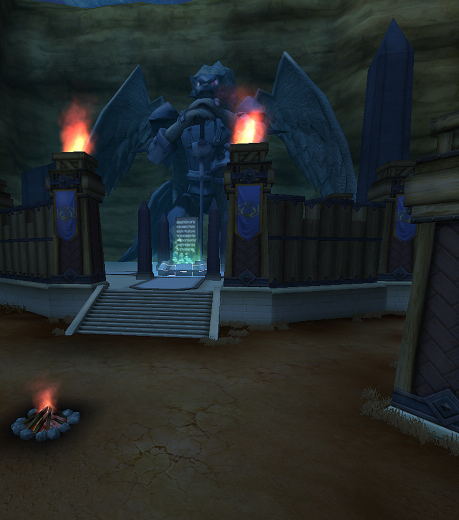

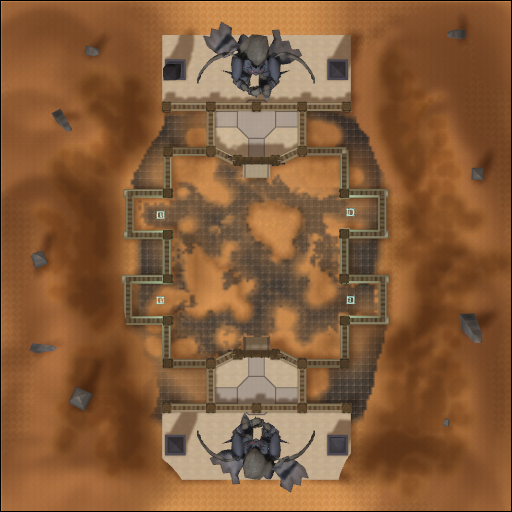

The Colosseum Stadium is a perfect stage for Digimon Arena.
Digimon Arena
The arena is located within the DATS Center near Yukaridramon and Chuchidarumon, but the map is in Western Village.
Guide to Digimon Arena
- Tamer level must be 10+ to participate.
- Only the Party Leader is able to start or finish the battle in Digimon Arena.
- You obtain Battle Points for each stage of the Digimon Arena that you complete.
- Battle Points can be invested through the NPC Board in DATS Center, and you can receive rewards according to the number of points invested.
- Once you start, you can't change between Normal Mode or Hero Mode.
- There are 40 levels in Normal Mode and 13 in Hero Mode.
- The monsters you face are the same, whether you enter Solo or as a Team.
- Hero Mode has much higher difficulty than Normal Mode, but you can obtain more Battle Points.
- The opponents from each level will gradually get stronger, as battle points per level will increase.
Related NPCs
- Miki Kurosaki: You can enter [Digimon Arena] through her.
- Board: You can invest your [Battle Point] on Board to claim your rewards.
- Mary: You can begin, continue challenges or leave Digimon Arena through her.
Ranking System
When you invest the Battle Points, you can obtain daily reward and will be registered in Weekly Ranking / Monthly Ranking / Seasonal Ranking.
The ranks will be refreshed periodically and you can check rank, guild, tamer name, changes, current rank reward.
When there are tamers with same amount of Battle Points, the first one to invest the Points will be in the lead of rank.
When the Ranking is refreshed, you can also check last week, last month, and last season's ranking.
Weekly Ranking
You can receive [Weekly] Arena Vouchers regarding to your rank of Weekly Ranking. Arena Vouchers can be exchanged to reward items through Digitamamon in DATS Center.
Weekly Ranking expires every Monday, and will be refreshed at 14:00 of every Tuesday.
Weekly Arena Voucher List
For Weekly Arena Voucher List click HERE
| Amount | Weekly Ranking |
|---|---|
| 1st Rank | |
| 2nd Rank | |
| 3rd Rank | |
| 4th ~ 5th Rank | |
| 6th ~ 10th Rank | |
| 0% ~ 10% Rank | |
| 10% ~ 20% Rank | |
| 20% ~ 30% Rank | |
| 30% ~ 40% Rank | |
| 40% ~ 50% Rank | |
| 50% ~ 60% Rank | |
| 60% ~ 70% Rank | |
| 70% ~ 80% Rank | |
| 80% ~ 90% Rank | |
| 90% ~ 100% Rank |
Monthly Arena Voucher List
For Monthly Arena Voucher List click HERE
| Amount | Monthly Ranking |
|---|---|
| 1st Rank | |
| 2nd Rank | |
| 3rd Rank | |
| 4th ~ 5th Rank | |
| 6th ~ 10th Rank | |
| 11th ~ 10% Rank | |
| 10% ~ 20% Rank | |
| 20% ~ 30% Rank | |
| 30% ~ 40% Rank | |
| 40% ~ 50% Rank | |
| 50% ~ 60% Rank | |
| 60% ~ 70% Rank | |
| 70% ~ 80% Rank | |
| 80% ~ 90% Rank | |
| 90% ~ 100% Rank |
Seasonal Arena Voucher List
For Seasonal Arena Voucher List click HERE
| Amount | Seasonal Ranking |
|---|---|
| 1st Rank | |
| 2nd Rank | |
| 3rd Rank | |
| 4th ~ 5th Rank | |
| 6th ~ 10th Rank | |
| 11th ~ 10% Rank | |
| 10% ~ 20% Rank | |
| 20% ~ 30% Rank | |
| 30% ~ 40% Rank | |
| 40% ~ 50% Rank | |
| 50% ~ 60% Rank | |
| 60% ~ 70% Rank | |
| 70% ~ 80% Rank | |
| 80% ~ 90% Rank | |
| 90% ~ 100% Rank |
Round Rewards Colosseum Normal Mode
| Round | Earned | Lost | Total | Round Boss | Round | Earned | Lost | Total | Round Boss |
| 1st Round | 1 | 0 | 1 | 21th Round | 7 | 11 | 52 | ||
| 2nd Round | 1 | 1 | 2 | 22st Round | 8 | 14 | 60 | ||
| 3rd Round | 1 | 1 | 3 | 23nd Round | 11 | 18 | 71 | ||
| 4th Round | 1 | 1 | 4 | 24nd Round | 13 | 23 | 84 | ||
| 5th Round | 1 | 1 | 5 | 25nd Round | 16 | 28 | 100 | ||
| 6th Round | 1 | 1 | 6 | 26nd Round | 20 | 35 | 120 | ||
| 7th Round | 2 | 2 | 8 | 27nd Round | 24 | 43 | 144 | ||
| 8th Round | 2 | 3 | 10 | 28nd Round | 28 | 51 | 172 | ||
| 9th Round | 2 | 3 | 12 | 29nd Round | 34 | 61 | 206 | ||
| 10th Round | 2 | 3 | 14 | 30nd Round | 39 | 72 | 245 | ||
| 11th Round | 2 | 3 | 16 | 31nd Round | 46 | 84 | 291 | ||
| 12th Round | 2 | 3 | 18 | 32nd Round | 52 | 97 | 343 | ||
| 13th Round | 3 | 4 | 21 | 33nd Round | 60 | 111 | 403 | ||
| 14th Round | 3 | 5 | 24 | 34nd Round | 68 | 127 | 471 | ||
| 15th Round | 3 | 5 | 27 | 35nd Round | 76 | 143 | 547 | ||
| 16th Round | 3 | 5 | 30 | 36nd Round | 85 | 160 | 632 | ||
| 17th Round | 3 | 5 | 33 | 37nd Round | 95 | 179 | 727 | ||
| 18th Round | 3 | 5 | 36 | 38nd Round | 104 | 198 | 831 | ||
| 19th Round | 4 | 6 | 40 | 39nd Round | 115 | 218 | 946 | ||
| 20th Round | 5 | 8 | 45 | 40nd Round | 126 | 240 | 1072 |
Round Rewards Colosseum Hero Mode
| Round | Earned | Total | Round Boss |
| 1st Round | 76 | 76 | |
| 2nd Round | 84 | 160 | |
| 3rd Round | 94 | 254 | |
| 4th Round | 104 | 358 | |
| 5th Round | 153 | 511 | |
| 6th Round | 118 | 629 | |
| 7th Round | 135 | 764 | |
| 8th Round | 152 | 916 | |
| 9th Round | 171 | 1087 | |
| 10th Round | 243 | 1330 | |
| 11th Round | 194 | 1524 | |
| 12th Round | 218 | 1742 | |
| 13th Round | 243 | 1985 |
![]() Note: On Hero mode you won't lose points when you fail
Note: On Hero mode you won't lose points when you fail
Colosseum Hero Mode Guide
![]() Note: Skill Order of Bosses heavily depends on Party Damage, if party Damage is High some skills can be "skipped" if damage is too low there may occur additional skills not included in Boss Skill Order
Note: Skill Order of Bosses heavily depends on Party Damage, if party Damage is High some skills can be "skipped" if damage is too low there may occur additional skills not included in Boss Skill Order
To see guides click HERE
Round 1 Omegamon:
Boss Skills:
- Skill 1: Omegamon will cast Big AOE Circle on himself, players need go away from boss to evade getting hit, if hitted player will receive
 Silence debuff which will prevent him from using skills.
- Skill 2: Omegamon will cast Small Yellow Circle on 1 player (on lower HP boss cast it on 2 players) other party members need to stack on said player to lower damage of skill.
- Skill Pattern of Boss:
- 70% Skill 1
- 60% Skill 1
- 50% Skill 2
- 40% Skill 1
- 30% Skill 1
- 15% Skill 2 (casted on 2 players)
Round 2 Dexmon
- Skill 1: Dexmon will cast Medium Circle 5 times on random player, if hitted you will receive
 Metallic Poison debuff that cause increase all incoming damage towards player, on lower HP Boss will cast this skill on 2 players at once. Players need go out from circle in order to evade getting hit. Each hit of skill cause increase debuff level:
| 1st hit – no damage increase | |
| 2nd hit – 100% damage increase | |
| 3rd hit – 200% damage increase | |
| 4th hit – 300% damage increase |
- Skill Pattern of Boss:
| 50% Skill 1 | ||
| 30% Skill 1 (casted on 2 players) |
Round 3 Minervamon X
- Skill 1: Minervamon X will cast Big AOE Circle on herself, players need go away from boss to evade getting hit, if hitted player will receive
 Confused debuff which will return some portion of damage to player that player will cause to boss.
- Skill 2: Minervamon X will cast Big Circle on 1 player (on lower HP boss cast it on 2 players), players need go away from circle to evade getting hit if hitted you will receive
 Burn debuff that will increase all incoming damage towards player by 100%.
- Skill Pattern of Boss:
| 70% Skill 1 | ||
| 60% Skill 1 | ||
| 50% Skill 2 | ||
| 40% Skill 1 | ||
| 30% Skill 1 | ||
| 15% Skill 2 (casted on 2 players) |
Round 4 Shoutmon X5
- Skill 1: Shoutmon X5 will cast AOE Skill (like Qinglongmon) on himself, players need go away from boss to evade getting hit, if hitted player will receive
 Fatigue debuff that will decrease player damage by 50%.
- Skill Pattern of Boss:
| 70% Skill 1 | ||
| 50% Skill 1 | ||
| 40% Skill 1 | ||
| 30% Skill 1 | ||
| 15% Skill 1 |
Round 5 Apocalymon
- Skill 1: Apocalymon will cast Big Circle on 1 player (on lower HP boss cast it on 2 players) , players need go away from circle in order to evade getting hit if hitted you will receive
 Slow Loading debuff that will decrease player movement speed by 70%
- Skill 2: Apocalymon will cast Big AOE Circle on himself, players need go away from boss to evade getting hit, if hitted player will receive Confused debuff which will return some portion of damage to player that player will cause to boss.
- Skill 3: Apocalymon will cast Big Poison Circle on 1 player (on lower HP boss cast it on 2 players) , players need go away from party members to evade summoning it under boss when casted said Poison field will do Damage over time to any player that is inside it.
- Skill 4: Apocalymon will cast Medium Circle (Meteors) |||||10 times on each player, if hitted you will receive Metallic Poison debuff that cause increase all incoming damage towards player. Players need go out from circle to evade getting hit. Each hit of skill cause increase debuff level:
| 1st hit – no damage increase | |
| 2nd hit – 100% damage increase | |
| 3rd hit – 200% damage increase | |
| 4th hit – 300% damage increase |
Apocalymon is Invisible throught entire duration of skill 4. After 10 initial circles there will be 10 medium sized poison field also casted on each player individually. After that Apocalymon will start One-Hit KO skill countdown and Piedmon mob will be spawned, players need to stack on Piedmon to receive special buff that will prevent dying from One-Hit KO skill.
- Skill Pattern of Boss:
| 70% Skill 1 | ||
| 60% Skill 2 | ||
| 55% Skill 1 | ||
| 45% Skill 2 | ||
| 40% Skill 3 | ||
| 35% Skill 1 | ||
| 30% Skill 4 | ||
| 25% Skill 1 (casted on 2 players) | ||
| 15% Skill 2 | ||
| 10% Skill 3 (casted on 2 players) |
Round 6 Dynasmon X
- Skill 1: Dynasmon X will cast Big AOE Circle on himself, players need go away from boss to evade getting hit, if hitted player will recive Silence debuff which will prevent him from using skills.
- Skill 2: Dynasmon X will cast Big Circle on 1 player (on lower HP boss cast it on 2 players) , players need go away from circle to evade getting hit if hitted player will receive Fatigue debuff that will decrease player damage by 50%.
- Skill Pattern of Boss:
| 70% Skill 1 | ||
| 60% Skill 1 | ||
| 55% Skill 2 | ||
| 45% Skill 1 | ||
| 35% Skill 1 | ||
| 25% Skill 2 (casted on 2 players) | ||
| 15% Skill 1 |
Round 7 Fanglongmon
- Skill 1: Fanglongmon will cast Big Blue Circle on random 2 players (on lower HP boss cast it on 4 players) need go away from each other to lower damage of skill.
- Skill 2: Fanglongmon will cast Small Yellow Circle on 2 player (on lower HP boss cast it on 4 players) other party members need to stack on said player to lower damage of skill.
- Skill Pattern of Boss:
| 70% Skill 1 | ||
| 60% Skill 1 | ||
| 50% Skill 2 | ||
| 45% Skill 1 | ||
| 35% Skill 1 (casted on 4 players) | ||
| 30% Skill 2 (casted on 4 players) | ||
| 25% Skill 1 (casted on 4 players) | ||
| 15% Skill 1 (casted on 4 players) | ||
| 5% Skill 2 (casted on 4 players) |
Round 8 Dukemon X
- Skill 1: Dukemon X will cast Big Circle on 1 player (on lower HP boss cast it on 2 players), players need go away from circle to evade getting hit if hitted you will receive Burn debuff that will increase all incoming damage towards player by 100%.
- Skill 2: Dukemon X will cast AOE Skill (like Qinglongmon) on himself, players need go away from boss to evade getting hit, if hitted player will receive Slow Loading debuff that will decrease player movement speed by 70%.
- Skill Pattern of Boss:
| 70% Skill 1 | ||
| 60% Skill 2 | ||
| 50% Skill 1 | ||
| 45% Skill 2 | ||
| 35% Skill 1 (casted on 2 players) | ||
| 25% Skill 2 | ||
| 15% Skill 1 (casted on 2 players) |
Round 9 Mastemon
- Skill 1: Mastemon will cast Big Poison Circle on 1 player (on lower HP boss cast it on 2 players), players need go away from party members to evade summoning it under boss when casted said Poison field will do Damage over time to any player that is inside it.
- Skill 2: Mastemon will summon 1x Angewomon and 1x LadyDevimon mobs (On low HP Mastemon will summon 2x Angewomon and 2x LadyDevimon). By killing Angewomon player will obtain special item called “Kiss of Love”, said item need to be used on LadyDevimon to kill her (to use item on Lady player need to be in combat state with LadyDevimon), if players fail killing LadyDevimon she will inflict huge damage to all players in colosseum.
- Skill Pattern of Boss:
| 70% Skill 1 | ||
| 60% Skill 1 | ||
| 50% Skill 2 | ||
| 45% Skill 1 | ||
| 35% Skill 1 (casted on 2 players) | ||
| 30% Skill 2 | ||
| 25% Skill 1 (casted on 2 players) | ||
| 15% Skill 1 (casted on 2 players) | ||
| 5% Skill 2 |
Round 10 Milenniumon
- Skill 1: After 4 auto attacks of Milenniumon he will cast Big Circle on 1 player (on lower HP boss cast it on 2 players), there are 2 kinds off circles that Milenniumon will be switching in fight , players need go away from circle in order to evade getting hit if hitted player will receive either Slow Loading debuff that will decrease player movement speed by 70% (if circle have blue aura in middle) or Silence debuff which will prevent him from using skills (plain circle).
- Skill 2: After 4 auto attacks of Milenniumon he will cast 5x Big Circle on 1 player (on lower HP boss cast it on 2 players), there are 2 kinds off circles that Milenniumon will be switching in fight (on lower HP boss will cast it both cricles) , players need go away from circle in order to evade getting hit if hitted player will receive either Slow Loading debuff that will decrease player movement speed by 70% (if circle have blue aura in middle) or Silence debuff which will prevent him from using skills (plain circle).
- Skill 3: Milenniumon will cast Big Poison Circle on each player, players need to position themselves correctly to not cover map with Poison when casted said Poison field will do Damage over time to any player that is inside it.
- Skill 4: Milenniumon will start casting rotation of Split and Stack circles. Rotation consists of 10 circles. Colours and sizes of circles are meant to confuse player so its highly recommended to follow this order:
| 1 | SPLIT | |
| 2 | SPLIT | |
| 3 | STACK | |
| 4 | STACK | |
| 5 | STACK | |
| 6 | SPLIT | |
| 7 | STACK | |
| 8 | SPLIT | |
| 9 | STACK | |
| 10 | SPLIT |
- Skill Pattern of Boss:
| 100%~70% 4 auto attacks Skill 1 | ||
| 69%~31% Skill 2 then Skill 1 wdsai | ||
| 30% Skill 3 right after it Skill 4 | ||
| 29%~0% Skill 2 (casted on 2 players) then Skill 1 (casted on 2 players) |
Round 11 Susanoomon
- Skill 1: Susanoomon will cast Big Circle on 1 player (on lower HP boss cast it on 2 players), players need go away from circle to evade getting hit if hitted player will receive Fatigue debuff that will decrease player damage by 50%.
- Skill 2: Susanoomon will cast AOE Skill (like Qinglongmon) on himself, players need go away from boss to evade getting hit, if hitted player will receive Silence debuff which will prevent him from using skills.
- Skill 3: When Susanoomon HP drop below |||||30% he will turn “Berserker” Mode causing him to cast skills more often. Susanoomon also gain 2x 30% Damage Reduction buff for himself that will stay until end of fight.
- Skill Pattern of Boss:
| 70% Skill 1 | ||
| 60% Skill 1 | ||
| 50% Skill 2 | ||
| 40% Skill 1 | ||
| 35% Skill 1 | ||
| 30% Skill 3 followed by Skill 1 and Skill 2 one after another | ||
| 20% Skill 1 (casted on 2 players) | ||
| 15% Skill 2 | ||
| 10% Skill 1 (casted on 2 players) | ||
| 5% Skill 2 |
Round 12 Rafflesimon
- Skill 1: Rafflesimon will cast Big Circle on 1 player (on lower HP boss cast it on 2 players) , players need go away from circle to evade getting hit if hitted player will receive Confused debuff which will return some portion of damage to player that player will cause to boss.
- Skill 2: Rafflesimon will cast Small Yellow Circle on 2 player (on lower HP boss cast it on 4 players) other party members need to stack on said player to lower damage of skill.
- Skill 3: When Rafflesimon HP drop below 30% he will turn “Berserker” Mode causing him to cast skills more often. Rafflesimon also gain 2x 30% Damage Reduction buff for himself that will stay until end of fight.
- Skill Pattern of Boss:
| 70% Skill 1 | ||
| 60% Skill 1 | ||
| 50% Skill 2 (casted on 2 players) | ||
| 40% Skill 1 | ||
| 35% Skill 1 | ||
| 30% Skill 3 followed by Skill 1 (casted on 2 players) and Skill 2 (casted on 4 players) one after another | ||
| 20% Skill 1 (casted on 2 players) | ||
| 15% Skill 2 (casted on 4 players) | ||
| 10% Skill 1 (casted on 2 players) | ||
| 5% Skill 2 (casted on 4 players) |
Round 13 Alphamon Ouryuken X
- Skill 1: Alphamon Ouryuken X will cast AOE Skill (like Qinglongmon) on himself, players need go away from boss to evade getting hit if hitted you will receive Burn debuff that will increase all incoming damage towards player by 100%.
- Skill 2: Alphamon Ouryuken X will cast Medium Circle 5 times on random player, if hitted you will receive Metallic Poison debuff that cause increase all incoming damage towards player, on lower HP Boss will cast this skill on 2 players at once. Players need go out from circle to evade getting hit. Each hit of skill cause increase debuff level:
| 1st hit – no damage increase | |
| 2nd hit – 100% damage increase | |
| 3rd hit – 200% damage increase | |
| 4th hit – 300% damage increase |
- Skill 3: When Alphamon Ouryuken X HP drop below 30% he will turn “Berserker” Mode causing him to cast skills more often. Alphamon Ouryuken X also gain 2x 30% Damage Reduction buff for himself that will stay until end of fight.
- Skill Pattern of Boss:
| 70% Skill 1 | ||
| 60% Skill 1 | ||
| 50% Skill 2 | ||
| 40% Skill 1 | ||
| 35% Skill 1 | ||
| 30% Skill 3 followed by Skill 1 and Skill 2 (casted on 2 players) one after another | ||
| 20% Skill 1 | ||
| 15% Skill 2 (casted on 2 players) | ||
| 10% Skill 1 | ||
| 5% Skill 2 (casted on 2 players) |
Monthly Ranking
You can receive [Monthly] Arena Vouchers regarding to your rank of Monthly Ranking. Arena Vouchers can be exchanged to reward items through Digitamamon in DATS Center.
Monthly Ranking expires at every last day of month, and will be refreshed at 14:00 of every first day of month.
Season Ranking
You can receive [Seasonal] Arena Vouchers regarding to your rank of Seasonal Ranking. Arena Vouchers can be exchanged to reward items through Digitamamon in DATS Center.
Seasonal Ranking expires at every last day of Season, and will be refreshed at 14:00 of day next month.
Hall of Fame
Top rank tamers at every end of Season will be recorded in Hall of Fame.
The tamer name and guild name recorded in Hall of Fame will not be changed.
The top rank tamers in Hall of Fame will have their duplicate image on the podium in DATS Center until the beginning of next Season.
- Starting and ending of each Ranking can be changed regarding to the service conditions.